The Clever Method Plumbers Use to Stop a Dripping Faucet
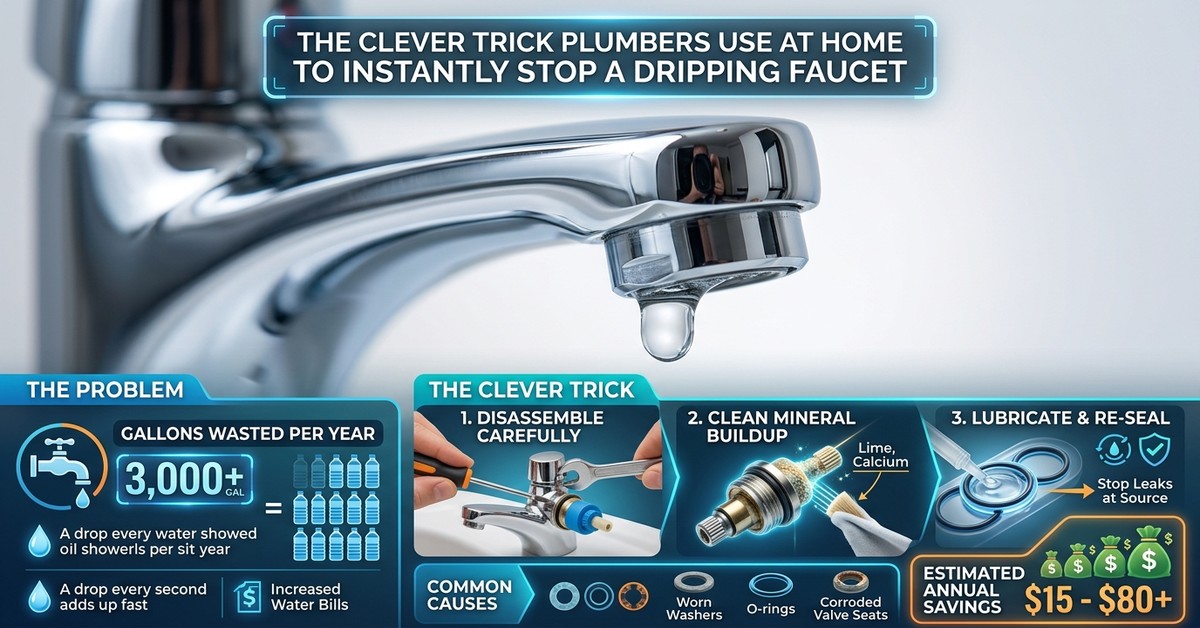
A persistent dripping faucet is more than just an annoyance; it’s a constant drain on your wallet and a waste of precious water. That incessant “drip, drip, drip” can waste hundreds of gallons per year, leading to significant utility bill increases and unnecessary environmental impact. While some homeowners might postpone fixing it, a persistent drip is a clear sign that your faucet needs immediate attention. Many feel intimidated by plumbing issues, but there’s a straightforward and effective approach that professional plumbers often employ to silence these watery culprits for good.
The root cause of most faucet drips typically lies within the faucet’s internal components, which inevitably wear out over time. Understanding this is key to applying what can be called the expert's reliable method for faucet repair.
A persistent dripping faucet is more than just an annoyance; it’s a constant drain on your wallet and a waste of precious water.
The Plumber’s Systematic Approach
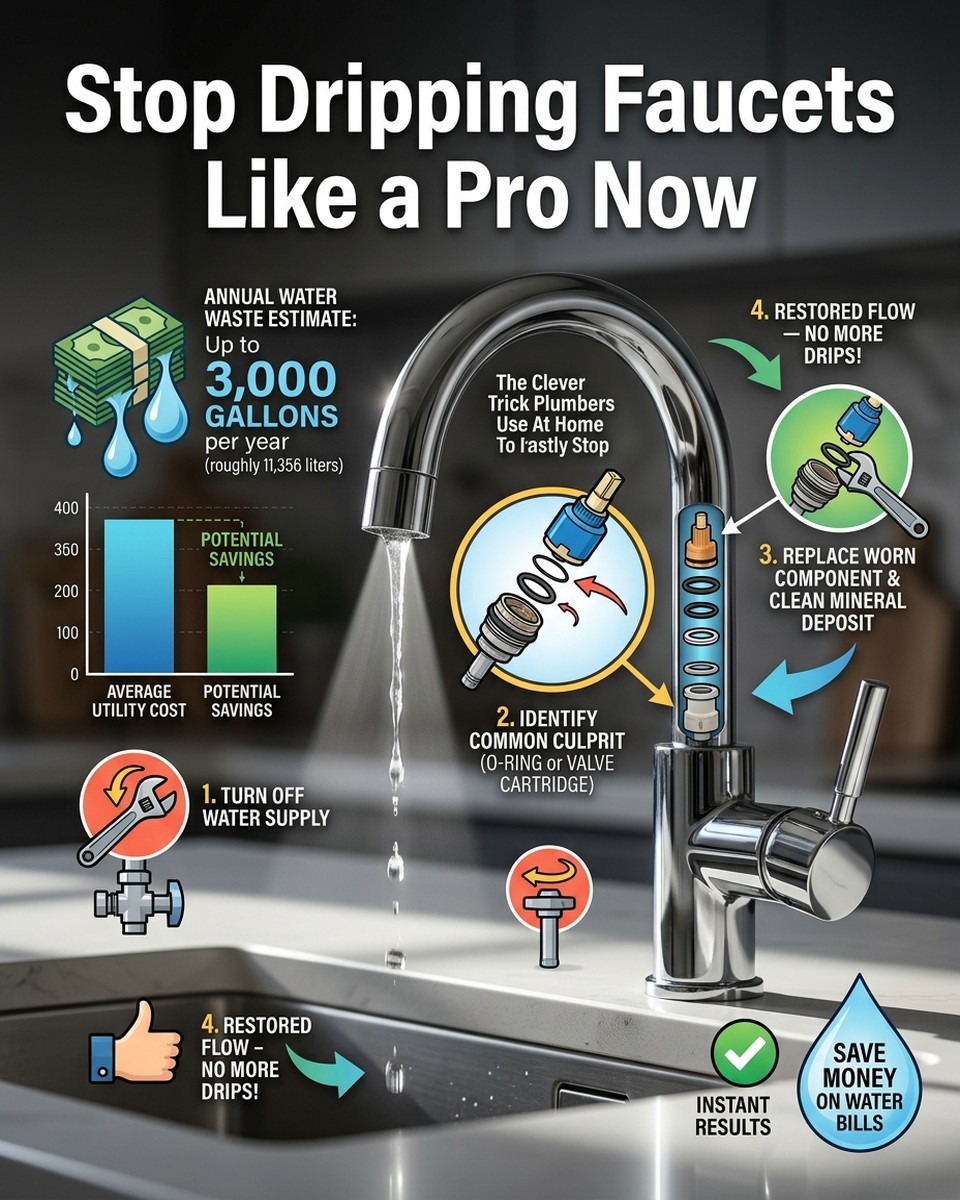
Plumbers don’t guess. They diagnose the problem systematically. According to resources like WikiHow and Family Handyman, the vast majority of faucet leaks stem from worn-out washers, O-rings, or cartridges located inside the handle assembly. Instead of temporary fixes, the clever method plumbers use at home involves precisely identifying the faulty component and replacing it.
Your 5-Step Guide to a Drip-Free Faucet
- 1. Shut Off Water Supply. Locate the shut-off valves under your sink (hot and cold) and turn them clockwise until fully off. Open the faucet briefly to drain residual water and relieve pressure.
- 2. Gather Tools. You’ll need a screwdriver, an adjustable wrench, needle-nose pliers, and replacement parts (washers, O-rings, or a cartridge kit specific to your faucet).
- 3. Disassemble the Faucet Handle. Remove any decorative caps to expose the handle screw. Unscrew it and lift off the handle.
- 4. Identify & Replace Worn Components.
- Compression Faucets: Remove the packing nut, lift out the stem. Pry off and replace the rubber washer at the bottom, and the O-ring around the stem.
- Cartridge Faucets: After removing the handle, locate and remove the retaining nut or clip. Pull out the cartridge. Take it to a hardware store for an exact replacement.
- Ball Faucets: Remove the cap and cam to access the ball assembly and spring-loaded rubber seals. Replace the springs and seals.
- Ceramic Disc Faucets: These are modern faucets. If the ceramic discs are faulty, the entire cylinder component usually needs to be replaced.
- 5. Reassemble and Test. Carefully put all components back together in reverse order. Tighten securely, but avoid overtightening. Slowly turn the water supply back on and check for drips. Your faucet should now be silent and leak-free.
This systematic, component-focused approach is why professionals are so effective. By following these steps, you can successfully fix your dripping faucet, save on water bills, and restore peace to your home.